Lab 04 - Create Data Validation Guided Rules
Lab Goal
To create guided rules for form field validation and managing our rule facts in memory for JBoss BPM Travel Agency
Data Validation Rules
We will be buidling two guided rules that validate our form data. This is a common usage of rules and
a typical scenario that you will often encounter in your BPM projects.
Create validation rule
We will create a rule to validate the data field:
TO DESTINATION
Creating guided rules
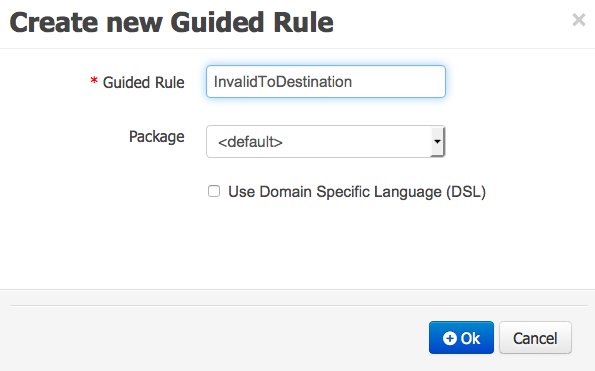
- Start by creating new guided rule:
AUTHORING -> PROJECT AUTHORING -> NEW ITEM -> GUIDED RULERESOURCE NAME: InvalidToDestinationPACKAGE: default- don't check the DSL box, click on
+OK
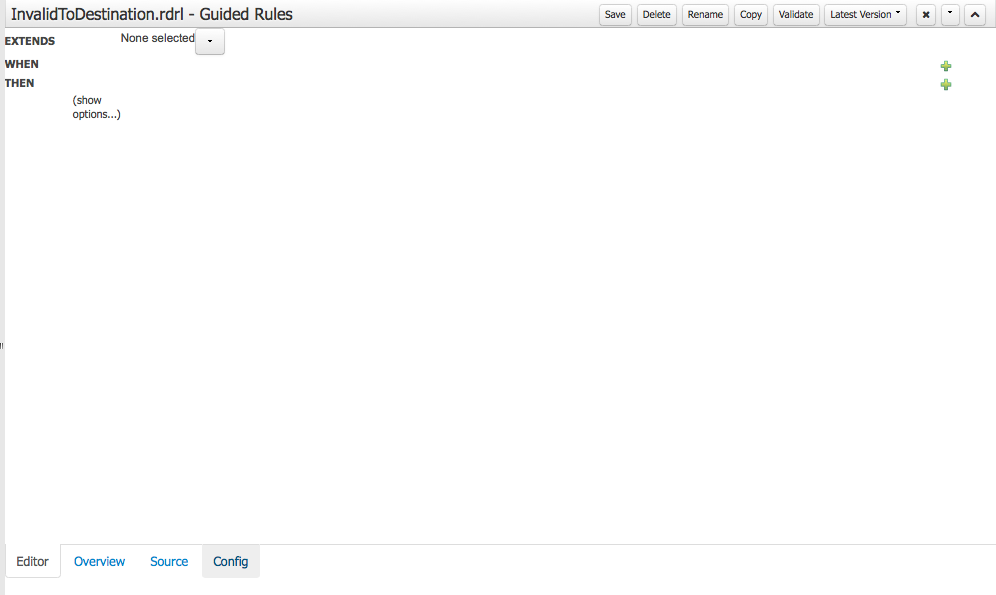
Creating guided rules
- Before writing the rule we need to import the needed model
- We need a few objects for this rule:
CONFIG tab on the bottom of rule
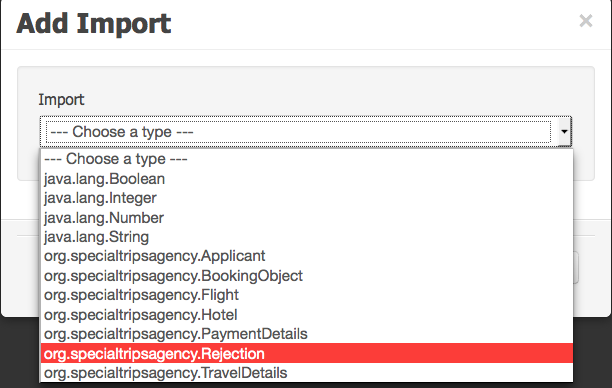
Creating guided rules
- Let's add the Rejection object:
NEW ITEM button at top, select Rejection- click on
+OK
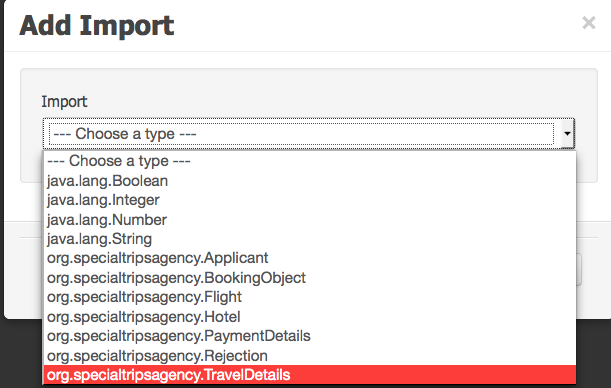
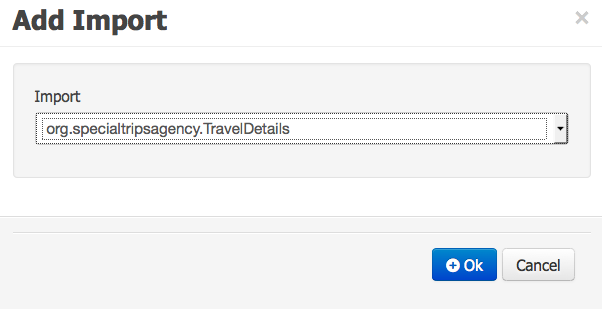
Creating guided rules
- Repeat the same to add
TravelDetails:
CONFIG tab on the bottom of ruleNEW ITEM button at top, select TravelDetails- click on
+OK
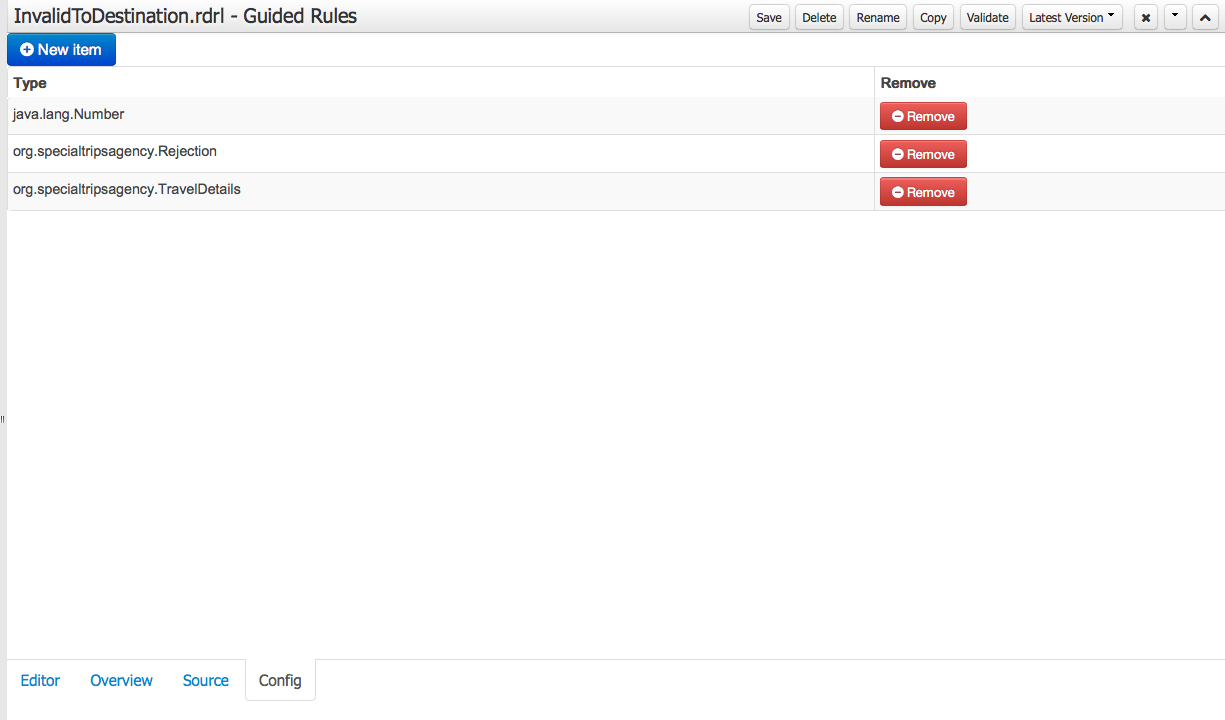
Creating guided rules
- Your
CONFIG tab should look like this:
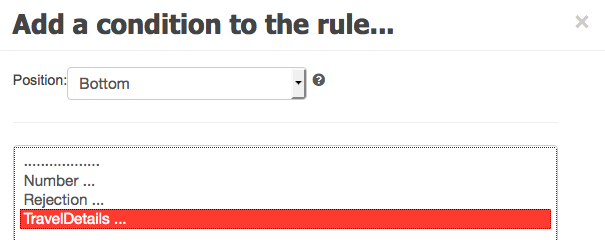
Creating guided rules
- Now return to the
Editor tab an start designing our rule
- Click on condition (WHEN)
GREEN PLUS ICON top right
- Select
TravelDetails and click +OK
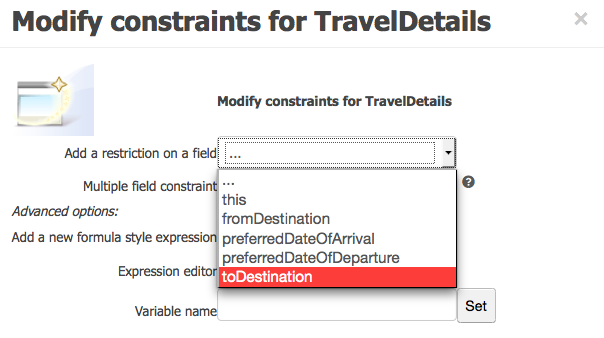
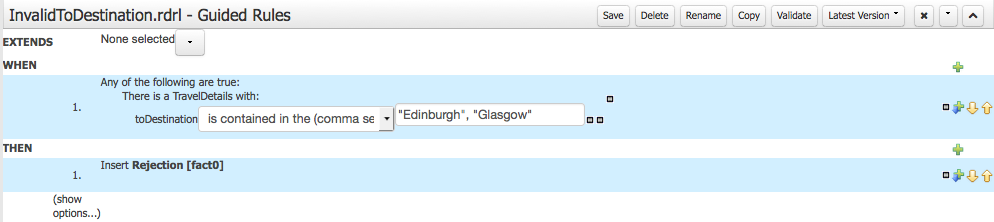
Creating guided rules
- Click on line
'There is a TravelDetails'
- Select
toDestination in 'Add a restriction to a field'
Creating guided rules
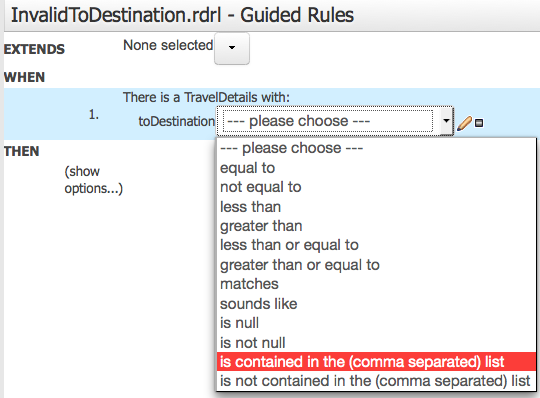
- Select
'is contained in...' from pull-down menu
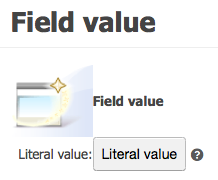
- click on
pencil mini icon and click on 'Literal value' in pop-up
Creating guided rules
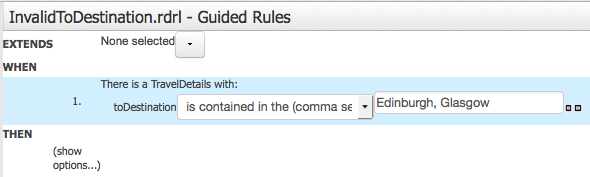
- Enter text in field:
Edinburgh, Glasgow
Creating guided rules
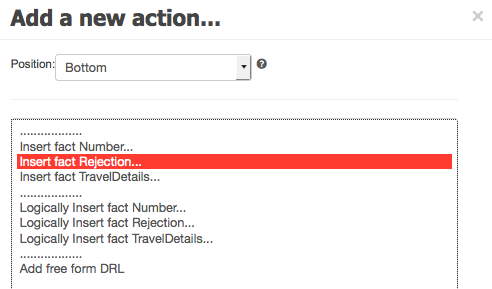
- The action (THEN) is a two part action
- The first action is to put a Rejection fact into memory
- We will use this to decide in the process if the field was valid:
- click on action (THEN)
GREEN PLUS ICON on far right
- select
Rejection and click +OK
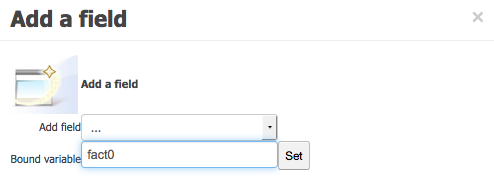
- click on
Insert Rejection, add BOUND VARIABLE: 'fact0', click on SET
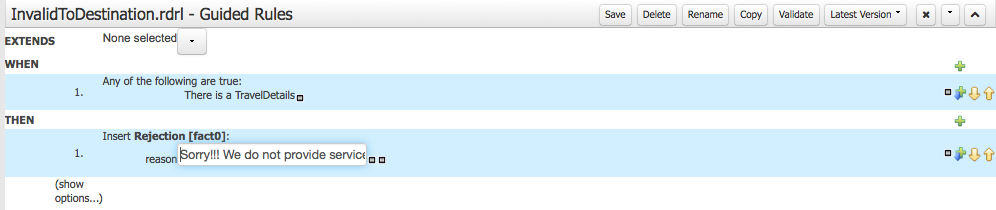
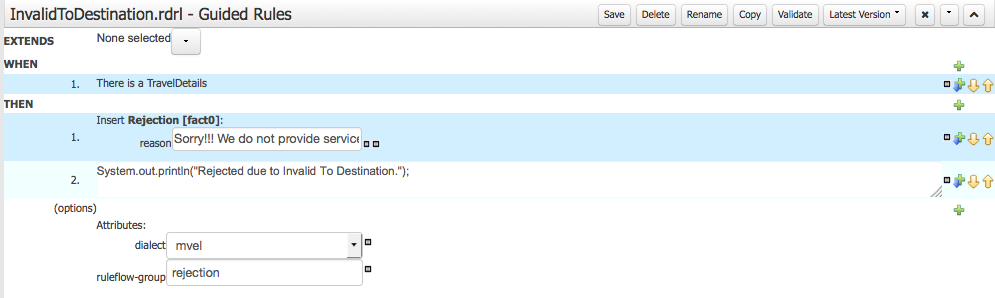
Creating guided rules
- Your rule should look just like below
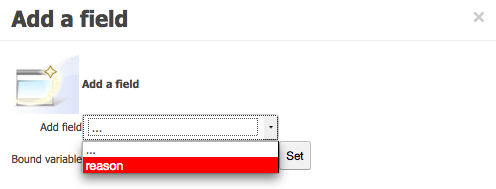
- Next we add a reason for the rejection
Creating guided rules
- This reason will be used to report why the destination was rejected:
- click on
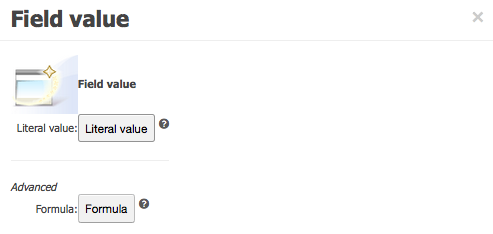
Insert Rejection, select ADD FIELD: reason
- click on
PENCIL MINI ICON, select FIELD VALUE: Literal value
Creating guided rules
- REASON:
Sorry!!! We do not provide service to this destination.
- Your rule should look just like below
Creating guided rules
- Now we add a second action (THEN) to log our actions
- click on action (THEN)
GREEN PLUS ICON on far right
- select
Add free form DRL and click +OK
Creating guided rules
- Now we add a second action (THEN) to log our actions
- click on action (THEN)
GREEN PLUS ICON on far right
- select
Add free form DRL and click +OK
- Enter text:
System.out.println("Rejected due to invalid To Destination.");
Creating guided rules
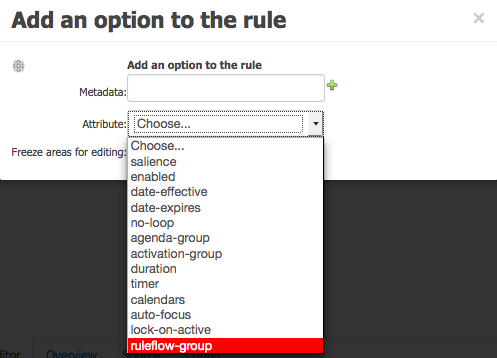
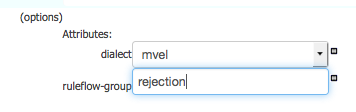
- Expand the 'show options' and add attributes (use GREEN PLUS ICON on right):
DIALECT: MVELRULEFLOW-GROUP: rejection
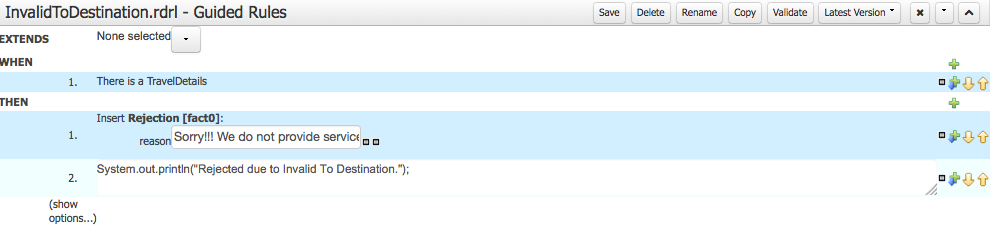
Save your guided rule
- Rule should look like shown below
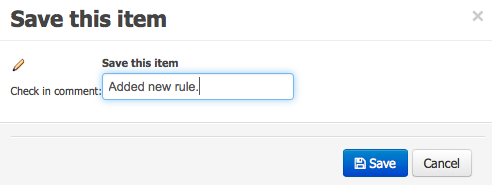
- Save the rule with comment message
Ensure project builds
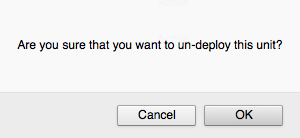
- Before you build project, ensure there are no active deployments
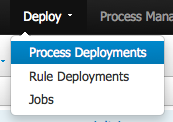
Deploy -> Process Deployments- if exists an entry for
Special Trips Agency 2.0.0 then remove by clicking on mini icon 
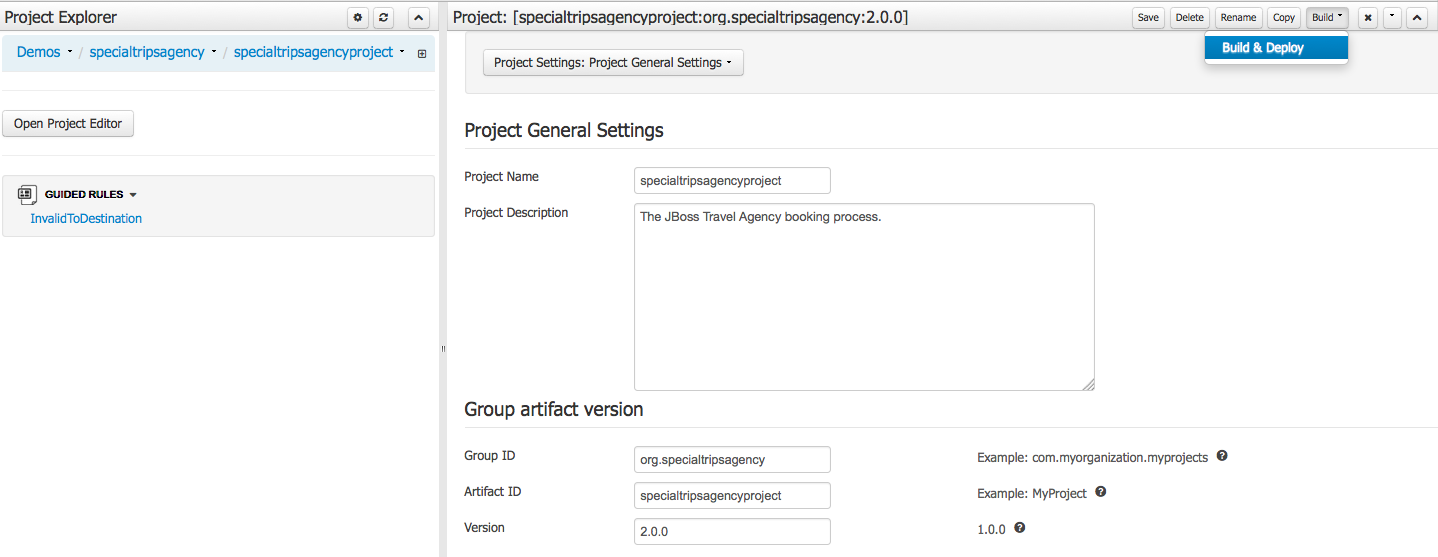
Ensure project builds
OPEN PROJECT EDITOR -> BUILD (top right) -> BUILD & DEPLOY(should see green pop-up 'Build Successful')
Create validation rule
Now you will create another rule that is quite similar to the previous rule, just this
time we will be creating a rule to validate the data field:
FROM DESTINATION
Creating guided rules
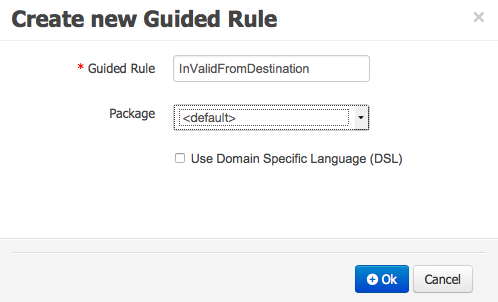
- Start by creating new guided rule:
AUTHORING -> PROJECT AUTHORING -> NEW ITEM -> GUIDED RULERESOURCE NAME: InValidFromDestinationPACKAGE: default- don't check the DSL box, click on
+OK
Creating guided rules
- Before writing the rule we need to import the needed model
- We need a few objects for this rule:
CONFIG tab on the bottom of rule
Creating guided rules
- Let's add the Rejection object:
NEW ITEM button at top, select Rejection- click on
+OK
Creating guided rules
- Repeat the same to add
TravelDetails:
CONFIG tab on the bottom of ruleNEW ITEM button at top, select TravelDetails- click on
+OK
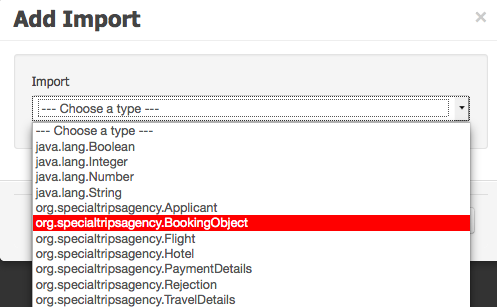
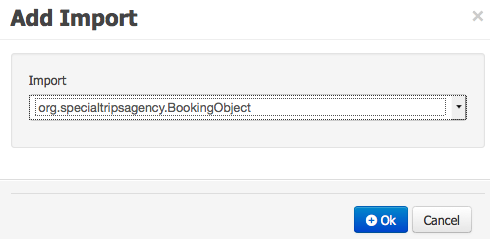
Creating guided rules
- Repeat the same to add
BookingObject:
CONFIG tab on the bottom of ruleNEW ITEM button at top, select BookingObject- click on
+OK
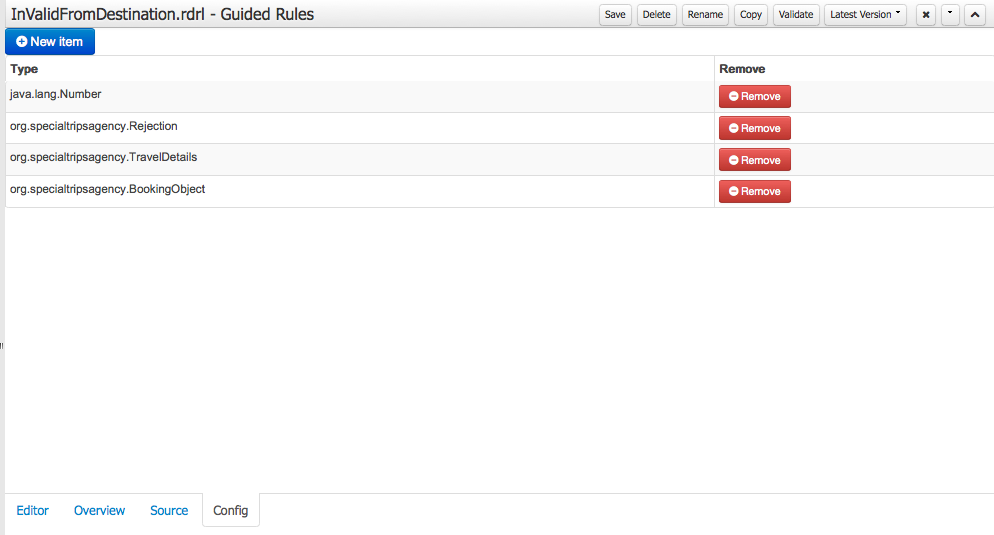
Creating guided rules
- Your
CONFIG tab should look like this:
Creating guided rules
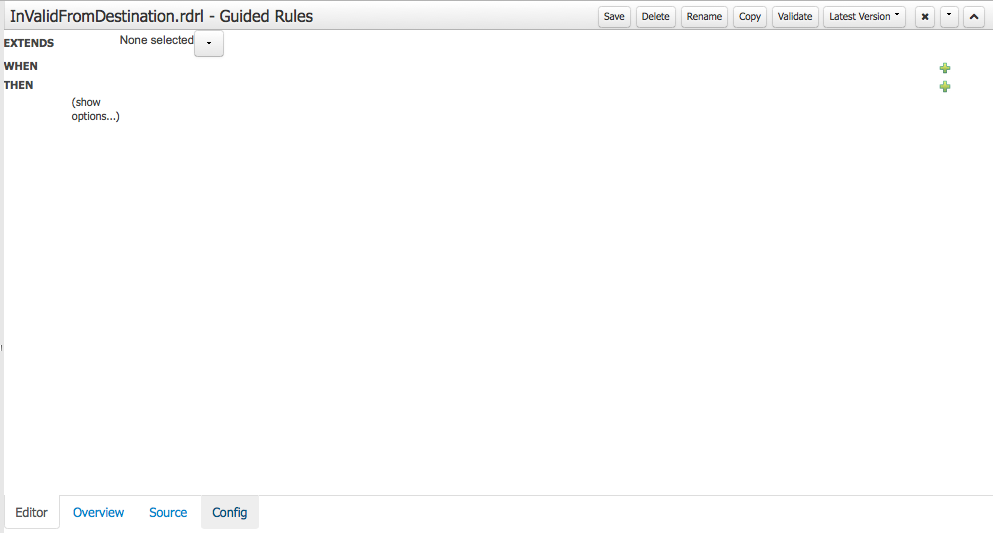
- Now return to the
Editor tab an start designing our rule
- Click on condition (WHEN)
GREEN PLUS ICON top right
- Select
TravelDetails and click +OK
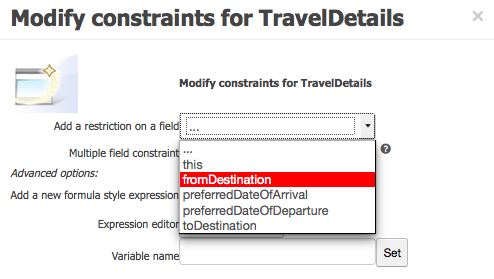
Creating guided rules
- Click on line
'There is a TravelDetails'
- Select
fromDestination in 'Add a restriction to a field'
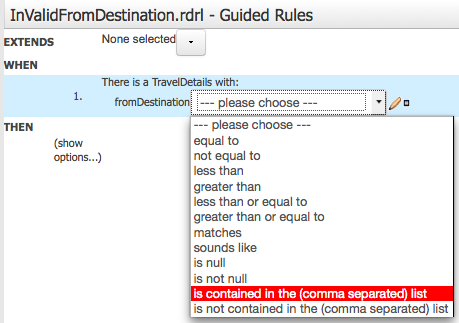
Creating guided rules
- Select
'is contained in...' from pull-down menu
- click on
pencil mini icon and click on 'Literal value' in pop-up
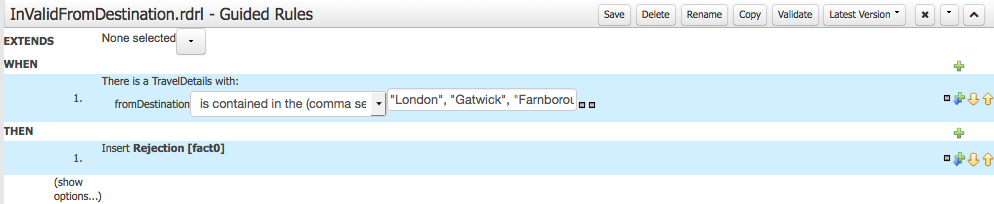
Creating guided rules
- Enter text in field:
London, Gatwick, Farnborough
Creating guided rules
- The action (THEN) is a two part action
- The first action is to put a Rejection fact into memory
- We will use this to decide in the process if the field was valid:
- click on action (THEN)
GREEN PLUS ICON on far right
- select
Rejection and click +OK
- click on
Insert Rejection, add BOUND VARIABLE: 'fact0', click on SET
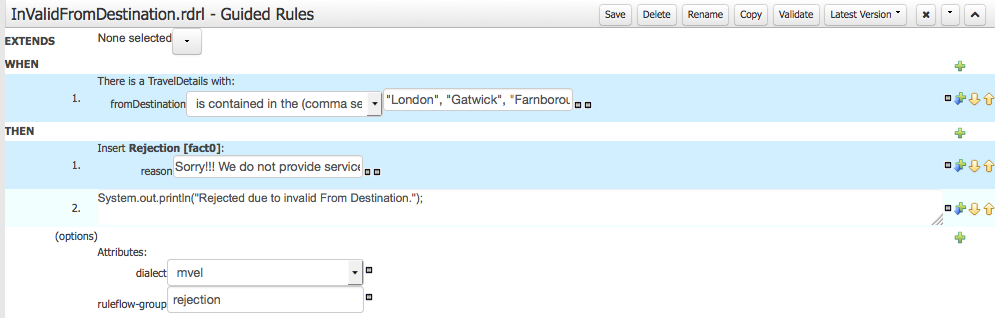
Creating guided rules
- Your rule should look just like below
- Next we add a reason for the rejection
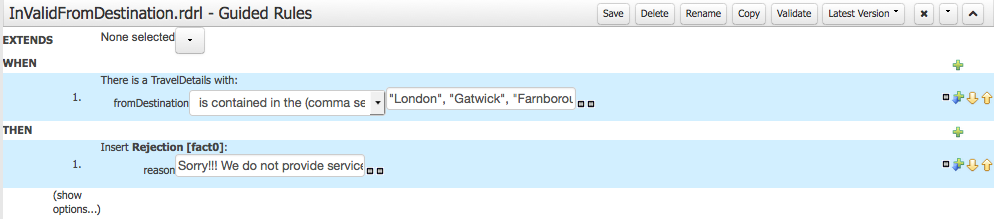
Creating guided rules
- This reason will be used to report why the destination was rejected:
- click on
Insert Rejection, select ADD FIELD: reason
- click on
PENCIL MINI ICON, select FIELD VALUE: Literal value
Creating guided rules
- REASON:
Sorry!!! We do not provide service from this destination.
- Your rule should look just like below
Creating guided rules
- Now we add a second action (THEN) to log our actions
- click on action (THEN)
GREEN PLUS ICON on far right
- select
Add free form DRL and click +OK
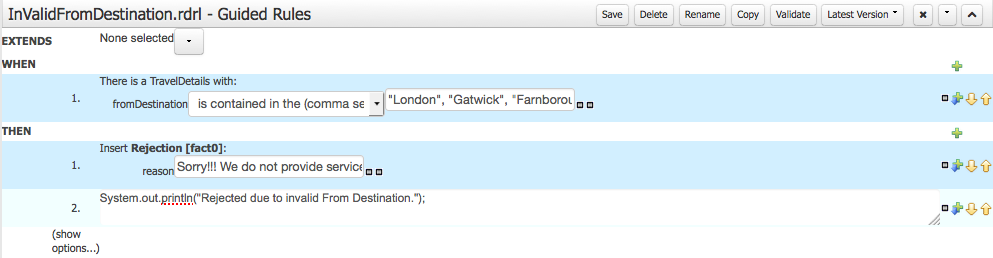
Creating guided rules
- Now we add a second action (THEN) to log our actions
- click on action (THEN)
GREEN PLUS ICON on far right
- select
Add free form DRL and click +OK
- Enter text:
System.out.println("Rejected due to invalid From Destination.");
Creating guided rules
- Expand the 'show options' and add attributes (use GREEN PLUS ICON on right):
DIALECT: MVELRULEFLOW-GROUP: rejection
Save your guided rule
- Rule should look like shown below
- Save the rule with comment message
Ensure project builds
- Before you build project, ensure there are no active deployments
Deploy -> Process Deployments- if exists an entry for
Special Trips Agency 2.0.0 then remove by clicking on mini icon
Ensure project builds
- right pane ->
OPEN PROJECT EDITOR -> BUILD (top right) -> BUILD & DEPLOY
(should see green pop-up 'Build Successful')
Building the Travel Agency
(next up, data validation with technical rules...)
- JBoss BRMS & BPM Suite Articles
- JBoss BPM Suite Demos
- JBoss bpmPaaS Demos